11/25/2015

How to Reset iPad Mini to Factory Settings When Screen is Black


When you iPad mini in the case of black screen, how can you reset your devices to factory settings. I think much iPad users are don’t know how to reset iPad mini to factory settings when screen is black, including me. So we can get answers as below.

The easiest way is to press and hold the home button and power button from under strong. But it is not useful to any iPad mini. So it is not the best answer.

How to deal with black iPad mini restore factory settings later


For that case, you can try entering DFU mode to restore as below.
Step1: Will your iPad off (home and power button simultaneously press 10 seconds to force shutdown, the effect is equivalent to pulling the battery).
Step2: Then holding down the switch button and the Home button, when you see the white Apple Logo, please release the switch button, and continue to hold the Home key.

Step3: Open iTunes, wait for it to prompt you to recovery mode, you can hold down the Shift key on the keyboard, click on "Restore", and select the appropriate firmware for recovery.
After that you can fix the trouble that you confused about easily.

iPad mini by System Restore how to restore black


Method 1:
Step1: A time when iPad Mini run into black sreen, then press the Home key will find the main screen does not work, do not have any reaction.
Step2: Then we can try iPad Mini press the power button on the back of the top of the lock, if it is caused due to a software system stuck black, under normal circumstances iPad Mini will automatically restart.
Step3: Remember a long press the power lock screen button.

Method2:
Step1: If you press the power lock key is still no response, then, next to the "main screen Home button and power button" simultaneously press and hold together and hold for 5 seconds or more.
Step2: These two buttons simultaneously, then press, you can force the shutdown iPad Mini, like direct long press the power button on the computer the same. Then press the power button to boot, so that iPad Mini to restart the system, you can resume normal use.

The two methods may helpful to a part of iPad mini users. If it is not helpful to you, or you can’t understand it clearly, you can see more as below.

How to use the tool-Reiboot to solve the problem of iPad mini black screen


Reiboot is a tool that only have two buttons to help iPad/iPhone/iPod users to deal with black/blue screen, frozen and other common troubles. You can learn more details about it as below.

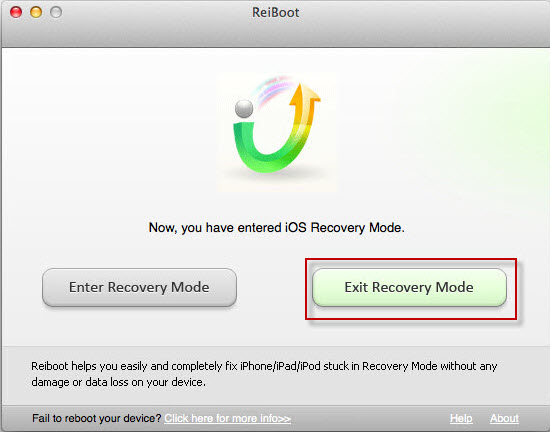
Steps1: Download Reiboot from the site as below and install it on any useful computer. And then connect your iPad mini that black screen to the computer.
Step2: Running Reiboot on the computer, and then click the button “enter recovery mode”, then it can help you fix iPad mini black screen in this progress. After that click the button “Exist recovery mode”, then your iPad mini will restart in normal with no black screen.

This is the much easier method for iPad users to learn how to fix iPad mini black screen. Hope you can remember the easy method to deal with the same trouble. Good luck to you.

11/15/2015

How to Undelete Voicemail on iPhone?

iPhone's voicemail feature made us listening to voicemail easier and better. When you "delete" a voicemail on the iPhone, it's not necessarily gone. Instead, it's moved into a Deleted Messages section. If you've deleted a voicemail and want to find it back, you can try the below 2 ways to undelete voicemail on iPhone.

Way 1: You can undelete vicemail directly on your iPhone

When our iPhone users lost their voicemail, most of them like to try this way to undelete vicemail on iPhone .
1.    Open your iPhone app and navigate the Voicemail icon at the bottom-right of the screen.
2.    Scroll down to the bottom of the list and hit "Deleted Messages" tab.
3.    Select the message you want to restore and tap on the "Undelete" to retrieve deleted voicemails.


Way 2: Use iPhone data recovery to recover voicemail on iPhone

If you have permanently deleted your iPhone voicemails and can‘t recover it with the way 1, don’t worry, Tenorshare iPhone data recovery can help you recover lost voicemail on iphone with 3 ways: recover voicemail directly from iPhone without backup, retrieve iPhone voicemail from iTunes backup and undelete voicemail from iCloud backup.
With this way, you can find that it can help you recover lost iPhone notes, sms, contacts, music, videos, call history and more from your iPhone with the 3 ways. Even if you lost data from damaged, crashed, broken or smashed iPhone or lost after iOS update/downgrade, jailbreak, factory settings restore. All can come back.

And the guide is so easy with the iPhone data recovery software. Take recover voicemail directly from iPhone without backup for excmple:
Step 1: Connect your iPhone to computer. Download the Tenorshare iPhone data recovery on your computer and connect iPhone to this computer via a USB cable.
Step 2: Start to scan your iPhone for the lost data. It won’t take too long time.
Step 3: Preview and recover lost voicemails and other data you need. After scanning, all the voicemails on your iPhone are listed. Select the voicemails you need to recover and click "Recover".


It is very easy, isn’t it? The other 2 ways to retrieve iPhone voicemail from iTunes backup and undelete voicemail from iCloud backup with the software are also very easy. Click here, you will know more about the details. Here, I would not say anything any more. Hope you can have a nice experience!


10/30/2015

Top 3 Free Tricks to Fix iPhone Stuck on Reboot Loop While Updating to iOS 9

“Dear all, I need your help! I am stuck in an endless reboot loop when I update my iPhone to iOS 9. The update is having issues. It gets stuck at 90%, fails and restarts my iPhone again and again. That’s really bad for me because I can’t use my iPhone now. Although I have backup the date in it, I really love this iPhone. I want to get it back, without endless reboot. So does anyone have the good idea to help with me?”

Most of the iPhone users are accustomed to use iPhone. Once they get an iPhone in hand, they are not likely to use Android. Since Apple usually updates their iOS system, the iPhone users update it, too. However, sometimes there are some bugs while upgrading it. In this article, we are going to share some tips about the iOS 9 reboot loop when updating iPhone to iOS 9. Hope it can do you a favor.


Tip 1: Restore iPhone with iTunes
The first easy way you can use it to use iTunes to restore your iPhone while updating to iOS 9. You can backup the data in your iPhone and then attempt to restore it. Just need to connect iPhone to the computer with USB cable and then open iTunes. It will automatically find your iPhone stucks in recovery mode. Then you can restore your Apple mobile phone with iTunes. After that, you can get your previous data in iTunes. Then you won’t lose anything.


Tip 2: Use Volume Up in iPhone
The second free way is to take ulitilize iPhone volume up button. But to mention that, this way is suitable to jailbroken iOS device only. You can press volume up button when the machine is booting up in order to get your iPhone out of reboot loop.


Tip 3: Get ReiBoot to Boot Up iPhone
The third free way is to make use of third-party freeware, such as Tenorshare ReiBoot. This little software is designed to solve all the iOS device stuck problems. With the simple enter and exit recovery mode button, your iPhone problems such as reboot loop, black screen…. will be fixed. I think we can’t find any other tool that is able to replace this gadget.


Well, that’s all about how to fix iOS 9 update reboot loop problems. You can choose one of them to solve your iPhone problem. Thank you and hope it helpful to you.

10/16/2015

How to Fix iPhone Crashes During iOS 9 Update

iOS 9 has some great features but it was complained by many users that the iPhone is easy to crash during iOS 9 update, for example, gets stuck while installing or won’t turn back on after it’s turned off. But don’t worry, there are some methods can help you to fix iPhone crashes when upgrade to iOS 9.

Below are five independent methods, but you need to try them one by one(If former method doesn’t work, you need to try the latter, until you try all 5 methods).

1. Hard Reset Your iPhone


You might like to hard reset your iPhone when it gets crashes in any situations, and it is really helpful in some cases, so recommend you can try this first when you found that your iPhone get freezes during iOS upgrade. Simultaneously hold down the Sleep/Wake button and the Home button around 10s.

2. Plug Your iPhone into a Wall Outlet


Sounds strange but the voltage power of your iPhone may be unstable, and lead to the crashed problem when update to iOS 9, so try to plug iPhone into a wall outlet, wait 10 to 15 minutes.

3. Restore Your iPhone in iTunes


If you've been backing up your iPhone, you can restore your iPhone in iTunes. First try doing it in the normal way, if that doesn't work, switch into recovery mode. When get all content and setup back onto your iPhone, you might get rid of the crashed condition from your iPhone.

4. Repair iOS System Errors


Some errors may occurred when update iPhone to iOS 9, so if the three methods above can't fix your problem, you need a third-party software like iPhone Care Pro to repair those system errors, the software can fix iOS crash, upgrade failure and any iOS stuck issues.

5. Get Help form Apple


Sometimes hardware or software picks update time to fail. And you need to get some help from an Apple retail store.

We try to offer a tutorial that you can operate steps by steps(every step is independent) to fix iPhone crashes during iOS 9 upgrade. General speaking, the methods above can fix your frozen iPhone in any cases, please try!

9/21/2015

iPhone 6 Plus on iOS 9 Not Charging, How to Fix it

We all know that iPhone is a much popular mobile phone brands. It is loved by most mobile phone users.  So when your iPhone 6 plus cannot properly charged, how can you deal with that problem?

iPhone 6 plus recharged into the point how to do


One of the methods is that you just need to install the "Unauthorized Lightning Cable Enabler", any Lightning lines (including knockoff) are able to make your iPhone6 plus charging.
How to install:
Step1: First, the device must have been jailbroken, open Cydia first enter the “Management” – “Software Sources“ – “Edit” – “Add” to add a new source address.
Step2: And then searching for Unauthorized Lightning Cable Enabler in the “search”.
Tip: If you can’t search Unauthorized Lightning Cable Enabler, you can enter Cydia- “change” - Click on the upper left corner Refresh - re-search the plugin.
Step3: After entering the top right corner of the “installation“, then click ”OK“, it will automatically start the installation.

The common situations and solutions for iPhone 6 plus not charing


Situation1: As usual we are accustomed to the phone stuck in his trouser pockets, at the bottom of the phone's charging port easily into the ash, thereby causing the interface and the power cord is bad. So when the phone does not charge when encountered, please check the bottom of the phone interface whether there has been a blockage.

Situation2: If the phone power interface is no problem, then we can use the replacement method, usually with the charger and power cord replaces it. This time around there is a computer, the Apple phone can access your computer's USB port, see whether you can charge properly. If you can be charged, then explain charger problem.

Situation3: If we connect the phone to the computer, it cannot charge it, and then you can borrow someone else's iPhone power cord, look after the changeover cannot be resolved. If you change the line to solve the problem, it means that the line is a problem, change the speed of the power cord it.

Situation4: If all of the above methods cannot solve your problem, then you need to recall, the phone whether there has been water. Because there will be water or fall could cause damage to internal parts of the phone, which cannot be recharged. Of course, there may be other cases, however, this time the phone may be a fault with the hardware, and personal advice to you is to phone Apple authorized repair service allows for testing.

iPhone 6 Plus Charge is Not Normal How To Do


I believe there are many users of the iPhone 6 Plus charge is not normal do not know how to do, based on past experience with the machine, the problem in the future from time to time with the machine during no possibility does not appear, so today small will come and everyone Share next iPhone 6 Plus charge is not normal how to do.

Step1: iPhone 6 Plus or other iPhone, we often need to charge at home, in the office charge, thus leading to the charging data cable and charger not enough, things often encountered this fruit powder.
Step2: If the charge, using the original data cable is not a normal state do not appear under normal circumstances. If you sometimes encounter, replace your appliance inserted row. Or go back to another socket is energized. If you change the position or so, there may be data cable or charger is damaged.
Step3: The data line is replaced with another one unoriginal, but better quality point line, into the charger, in general, can be charged, if not, try to replace the charger, there may be damage to the charger.
Step4: Here to the recommended use of official original charger with data cable, this phone is guaranteed.
After the above 4 steps, you can solve the problem of iPhone 6 plus charge is not normal easily.

Hoping this blog is much useful to you. And it can helps you solve the problem of iPhone 6 plus on ios 9 not charing in easiest and quickest way.

9/07/2015

Top 3 ways to unfreeze iPhone 6 Plus after iOS 9 Upgrade


Many iPhone 6 Plus users have complained that "My iPhone 6 Plus frozen after iOS 9 upgrade."In this article, I will give you some good ways to fix iPhone 6 Plus frozen during or after iOS 9 update.

Way 1. Use Home Button


To unfreeze your iPhone6 Plus, you can try to press and hold down the Home button for about 10 seconds. Then you will be returned to the Home screen with everything working again. This way is very easy and most people like to have a try at first. If this method does not work, you can try the following methods.

Way 2. Restore iPhone 6 Plus to Factory Settings


You can try to restore your frozen iPhone 6 Plus with factory settings. This way maybe will erase all of your iPhone 6 Plus data. But don’t worry, you can recover all your lost iPhone 6 Plus data after factory reset.
1.    Connect your iPhone to computer and run iTunes.
Tips: 1) This step need you make sure that your iPhone 6 Plus is in the Recovery mode .
         2) If you fail to restore your iPhone 6 Plus, try to get iPhone into recovery mode again. If it still doesn't work? Maybe your iOS system is damaged. At this time, you have to put iPhone into DFU mode before you can restore iPhone. What’s the most important that you must make sure you have backed up your iPhone 6 Plus data before. Because, DFU mode will  get your data lost forever.

2.    When your iPhone 6 Plus appears in iTunes, select the iPhone icon in the Devices list and click "Restore".  

3.    Then the iTunes will display the latest update information for you, follow the wizard and iTunes will automatically download the latest firmware used to update iPhone to iOS 9.
4.    After factory settings restore, you can restore iPhone from a backup in iTunes. If you don't have a backup, iPhone Data Recovery can help you recover all your lost files from iPhone without backup. 


Way 3: Use Freeware ReiBoot


ReiBoot is the professional freeware which can help you reboot the frozen or hung iPhone and fix frozen iPhone after iOS 8/9 upgrade. And, you will not lose anything and your iPhone 6 Plus will run smoothly.
1.Download ReiBoot and install it on your computer. 
2.Connect iPhone to your PC and run ReiBoot. Click "Enter Recovery Mode". 


Hope one of the way can help you unfreeze your iPhone 6 Plus after iOS 9 Upgrade!

8/31/2015

How to Fix iPad Freeze After iOS 9 Update

As the iOS 9 release online, some of the iPad users may update their iOS system to iOS 9 in order to experience it. However, not every update is a perfect update. There are still some bugs while updating iPad to iOS 9, such as the frozen iPad. That is to say, some iPad freezes after updating to iOS 9. Here in this article, we will tell you how to fix iPad freeze after iOS 9 update in 3 ways. You can try one of them and keep on using iPad with iOS 9 system.


Tricks 1: Attempt a hard reboot


You can make use of the hard reboot after the issue occurs. How to use the hard reboot? At first, hold down the Home button and Power button at the same time until you see the Apple logo. Keep holding two buttons down for at least 30 buttons. If nothing happens, you have to ask for other workable methods for help in order to continue using your iPad.

Tricks 2: Insert a Wall Outlet


This is the second possible way to fix your iPad. You can just charge your iPad into outlet and then your frozen iPad is about to be triggered. Wait for about 15 minutes, if your iPad is still not responding, you had better ask for other tricks.

Tricks 3: Freeware: Reiboot


The last alternative you can use is the Reiboot. It is designed to help with you in and out of iOS device recovery mode. You won’t lose any data while using Reiboot. Except for fixing the frozen iPad, you can even use this freeware when your iOS devices get stuck in iTunes logo or Apple logo. It supports Windows and Mac.

Well, to use this freeware, you just need to download and install Reiboot from its official website or other download center. And then connect your iPad to computer, open the software and to choose “Enter Recovery Mode” or “Exit Recovery Mode” button.